This is default featured slide 1 title

Beauty, beauty products, skin, nails, beauty tips, beauty news, product reviews, free makeup samples, free samples, makeup samples, total beauty, expert beauty advice, Hairstyles, product reviews, cosmetics, Total Beauty Media, makeup and accessories, Find tips and reviews on cosmetics, hair styles and share your new looks with our fashion community, Browse Makeup Tutorials and Reviews, healthy recipes, DIY home decor ideas, money saving tips, giveaways, recipe for beauty collect from this site

This is default featured slide 2 title

Beauty, beauty products, skin, nails, beauty tips, beauty news, product reviews, free makeup samples, free samples, makeup samples, total beauty, expert beauty advice, Hairstyles, product reviews, cosmetics, Total Beauty Media, makeup and accessories, Find tips and reviews on cosmetics, hair styles and share your new looks with our fashion community, Browse Makeup Tutorials and Reviews, healthy recipes, DIY home decor ideas, money saving tips, giveaways, recipe for beauty collect from this site

This is default featured slide 3 title

Beauty, beauty products, skin, nails, beauty tips, beauty news, product reviews, free makeup samples, free samples, makeup samples, total beauty, expert beauty advice, Hairstyles, product reviews, cosmetics, Total Beauty Media, makeup and accessories, Find tips and reviews on cosmetics, hair styles and share your new looks with our fashion community, Browse Makeup Tutorials and Reviews, healthy recipes, DIY home decor ideas, money saving tips, giveaways, recipe for beauty collect from this site

This is default featured slide 4 title

Beauty, beauty products, skin, nails, beauty tips, beauty news, product reviews, free makeup samples, free samples, makeup samples, total beauty, expert beauty advice, Hairstyles, product reviews, cosmetics, Total Beauty Media, makeup and accessories, Find tips and reviews on cosmetics, hair styles and share your new looks with our fashion community, Browse Makeup Tutorials and Reviews, healthy recipes, DIY home decor ideas, money saving tips, giveaways, recipe for beauty collect from this site

This is default featured slide 5 title

Beauty, beauty products, skin, nails, beauty tips, beauty news, product reviews, free makeup samples, free samples, makeup samples, total beauty, expert beauty advice, Hairstyles, product reviews, cosmetics, Total Beauty Media, makeup and accessories, Find tips and reviews on cosmetics, hair styles and share your new looks with our fashion community, Browse Makeup Tutorials and Reviews, healthy recipes, DIY home decor ideas, money saving tips, giveaways, recipe for beauty collect from this site

Thursday, December 18, 2014

Nutella Brownies


Nutella Brownies recipe 

This Nutella Brownies  almost didn’t happen. But aren’t you glad they did?
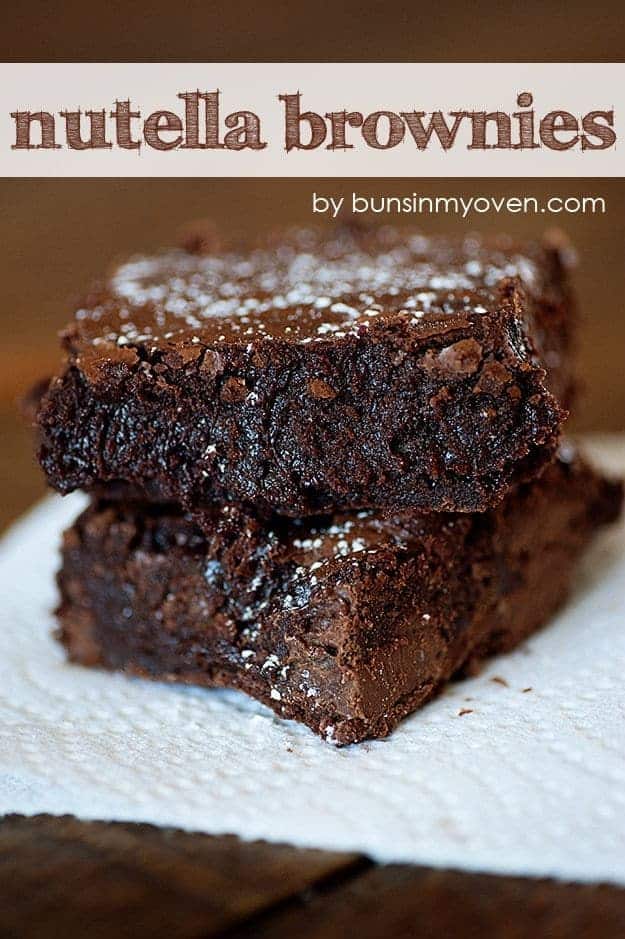
They were a last minute, oh hey, chocolate sounds kinda good, let’s do our favorite brownie recipe. Then, as I was grabbing the flour from my cabinet, I bumped into the jar of NutellaNutella Brownies recipe and, well, I just went with it. Divine intervention, y’all. It’s a thing.

Nutella Brownies recipe 


After seeing how decadent and fudgy they were, I busted out my macro lens. I usually shoot with a 50mm 1.4Nutella Brownies recipe, but these were begging for my dusty ol’ macro that I never use and yet can’t seem to part with. I think it’s safe to say that the macro will be getting plenty of use after these photos. You can almost reach through the screen and stick your finger into the gooey chocolate, amirite?

Nutella Brownies recipe 

Now, seriously, I’ll get around to a healthy recipe one of these days. Maybe even soon! It’s just that there are so many more treats and desserts that I feel like sharing first. You’re not complaining, are you?

Nutella Brownies recipe 

Update: After receiving a couple of comments from those of you who have tried these, I wanted to clarify that the predominant flavor here is chocolate, not Nutella. The Nutella just gives these a burst of chocolate fudginess, but the hazelnut flavor is not super noticeable in these brownies. Plenty of you have commented something along the lines of “best brownies ever” so please do try these! I just don’t want to set you up for disappointment if you’re expecting a full on Nutella assault. Nutella Brownies recipe
Update 2: A few of you have mentioned reducing the sugar. I haven’t tried that myself as these are the perfect sweetness for me. I don’t find them too sweet or too dark tasting and think they’re pretty perfect myself. However, if you’d like to try reducing the sugar, it sounds like people are getting away with 1 3/4 of a cup with no problem. Feel free to play around and see what you think, but do know the texture may not be quite the same.
Updated 3: The chocolate chips/baking melts in this recipe as are totally optional. They will add a bit of texture to your brownies. If you like nuts in your brownies, you will likely be a fan of the chocolate chips. If not, skip them entirely. Nutella Brownies recipe
Nutella Brownies recipe

Nutella Brownies

These decadent brownies are full of Nutella, cocoa, and milk chocolate for a super fudgy treat! These are, dare I say, even better than the box mix brownies we all love!

Ingredients:

1 cup (2 sticks) butter
2 1/4 cups sugar
1/2 cup Nutella
4 large eggs
1 1/4 cups cocoa powderNutella Brownies recipe
1 teaspoon salt
1 teaspoon baking powder
1 teaspoon espresso powder, optional
1 tablespoon vanilla extract
1 1/2 cups all-purpose flour
10 ounce package Hershey's Milk Chocolate Baking Melts (or chocolate chips)

Directions:

Pre-heat the oven to 350 degrees. Butter a 9x13 baking dish.
In small saucepan over low heat, melt butter completely. Stir in sugar and continue cooking for 1-2 minutes, stirring constantly. Do not allow sugar mixture to boil.
Remove from the heat and stir in the Nutella until well combined.
Pour butter mixture into a large bowl or stand mixerNutella Brownies recipe, beat in cocoa powder, eggs, salt, baking powder, espresso powder, and vanilla extract. Mix until well combined.
Stir in the flour and baking melts until just combined.
Spread into prepared pan (batter will be very thick and sticky) and bake for about 30-35 minutes, until a tester comes out mostly clean. The edges should be set and the center should still look slightly moist, but not uncooked. Cool on a wire rack.
Love Nutella? Check out my other recipes featuring Nutella!

Nutella Brownies recipe 

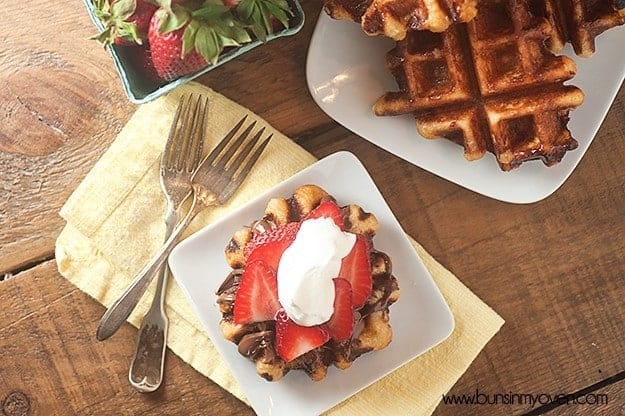
Liege Waffles with Nutella and Strawberries
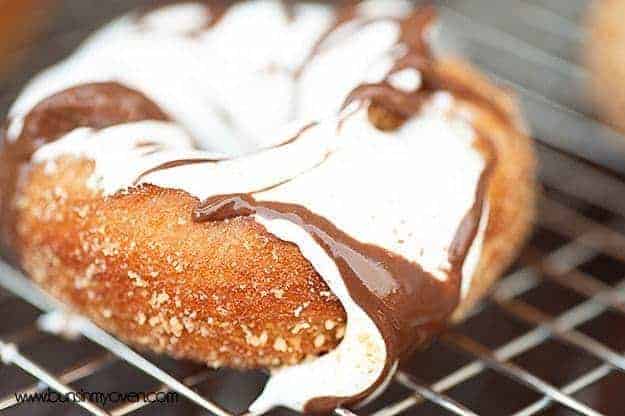
Nutella Brownies recipe
S’mores Donuts

Nutella Brownies recipe
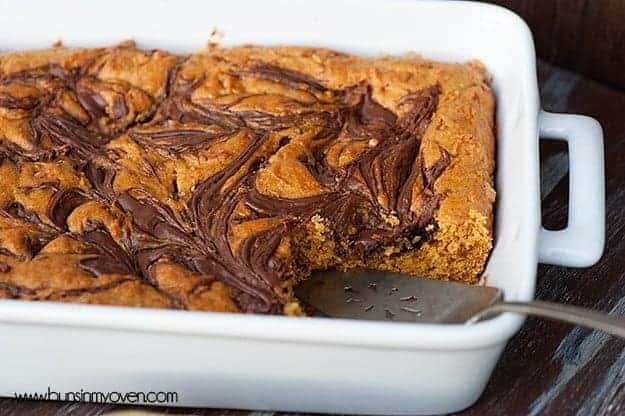
Nutella Swirled Pumpkin Bars

Nutella Brownies recipe
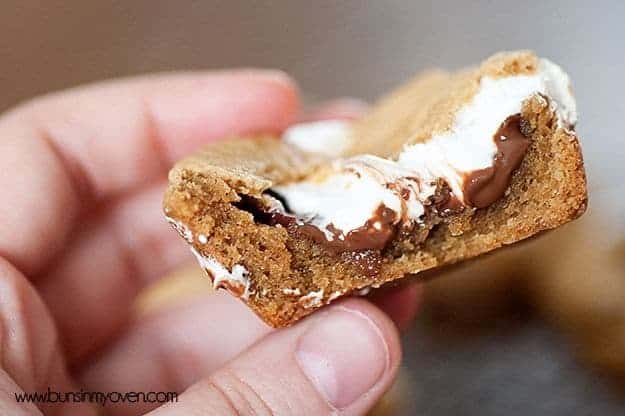
Peanut Butter S’mores Cookie Cups

Nutella Brownies recipe
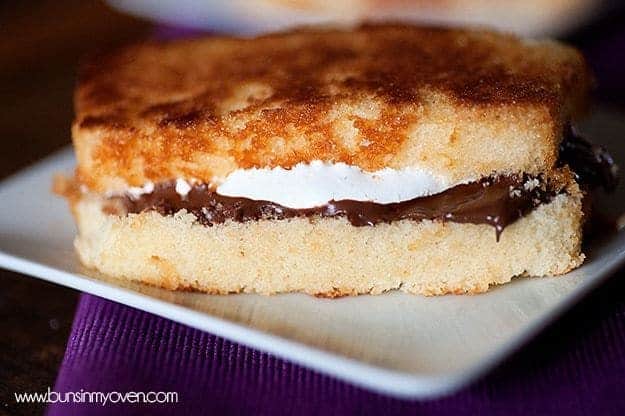
S’more Pound Cake Sandwiches

Three flavored waters


Since we'll be spending the next few weeks doting on the new baby, I've scheduled daily regular posts and guest posts, which I hope you enjoy. Of course, I'd love to pop in now and again to share family photos and our birth story, as well!

First up: Do you ever make flavored water? It's easy and refreshing, and it's beautiful to serve when entertaining friends (or just reading a book outside). Plus, regular water gets boring! Below are three great variations we tried out...


Blackberry Sage. This was the crowd favorite. Tip: Massage or crush the herbs before putting them in the water to help release the full flavor.


Mixed Citrus. We used oranges, lemons and grapefruit; and blood orange would be beautiful, too. Tip: We actually added sparkling water to this one, which was delicious.


Ginger Mint. This had a great kick. Tip: The longer the ingredients steep, the stronger the flavor will be, so consider mixing this up a few hours ahead of time, depending on how strong you'd like the flavors to be.


Thoughts? Any other flavors you'd recommend?

A handy guide to creating the perfect cheese plate


I may or may not be obsessed with cheese (are you, too?), so the fact that we live down the street from Murray's Cheese, the most amazing cheese shop that ever existed, is fabulous and a little dangerous. The shop is packed with incredible cheeses, meats, chocolates, breads and ice creams, and the cheesemongers are geniuses (and give samples!). Toby and I venture over there at least twice a week, and we're both fatter and happier for it.

So, my darlings, I'm thrilled to present this handy guide to creating the perfect cheese plate! I met with Murray's head cheesemonger Sydney Willcox to discover her tried-and-true tips, and the lovely Jamie Beck took photos. Here goes...


Overall pointers for putting together a cheese plate:
* When you invite friends over, buy one ounce per person per cheese; and stick to five to six cheeses total.
* Choose a fun variety of cheeses: different textures, countries, and all three milk types (goat, sheep, cow).
* Serve all the cheeses on one big board. You want your guests to start with the mildest and work up to the strongest, so place the cheeses in "clock order"--12 o'clock being the mildest and 11 o'clock being the strongest.
* Take the cheese out of the fridge at least an hour before serving. Cheese should be eaten at room temperature, when it's at its full flavor and texture.
* Put out a few different knives. Goat and blue cheeses crumble if you use a regular knife, so cheese wires are the best thing to use--if you don't have one, you can use dental floss! Softer cheeses work best with a butter knife. Harder cheeses, like parmesan, are good with a triangle-shaped knife. Cut circular cheeses in wedges, like a pizza.
* If you have leftovers, don't store the cheese in Saran Wrap, which will make the cheese sweat and leave a plastic-y taste. Cheese is living and needs to breathe, so wrap it in parchment or wax paper, and keep it in the most humid part of the fridge (usually the vegetable drawer).


Six cheeses for the perfect basic cheese plate:
(pictured clockwise from top)

1. Cremont is a bloomy, rindy, mild cheese, which debuted last year in Vermont. (The name "cremont" is a mix of "cream" and "Vermont"!) The cheese has both cow and goat milk. Luscious, coats your tongue, fudge-y, cake-y.

2. La Tur is the little black dress of cheeses! Everyone loves it. It's a mix of goat, sheep and cow--which is is pretty unusual. Flavorwise, you get a hint of all three animals--tang from the goat, lingering buttery fat from the sheep, milky sweetness from the cow. The texture feels almost whipped, like savory ice cream! At a party, this insanely popular Italian cheese will disappear first.

3. Pyrenees Brebis. Every single person I've has ever met loves this sheep's milk cheese. It's a huge crowd-pleaser. A lot of flavor, but very harmonious. Nutty, salty, floral, semi-soft. From the southwest region of France, where there are huge herds of sheep.

4. Cabot Clothbound Cheddar. Cabot makes lots of cheddars, but this is their artisanal (read: fancy!) line. What's cool about this cheese is that it's a partnership between Cabot and the Cellars at Jasper Hill--Cabot makes the cheese, which is then aged in the Cellars at Jasper Hill. There's actually a staff of guys (football-player size!) who flip these cheeses everyday, so they'll age evenly. The cheese is wrapped in cloth, which is a more English style of making cheese. Super strong cheddar; you get little crystals. You'll taste peanuts, caramel, earthy flavors. Eat from the inside out; then take the cloth off and then eat the rind--it almost takes like dirt, but it works so well with the other flavors. (P.S. It would make the best grilled cheese you'd ever have in your life.)

5. Pleasant Ridge Reserve. Made with raw Jersey cow's milk in Wisconsin. Very fruity and smooth. The American Cheese Society just named it "Best in Show" for the third time (it's the only cheese to have been awarded Best in Show more than once!). You've gotta try it.

6. Cambozola Black Label is a very, very delicate blue cheese. Just a tinge of that mineral flavor; very buttery with a bit of a cashew flavor. A great beginning cheese for people who think they might not like blue cheeses. (Once you put it on bread and add a grape, it will mellow out, if you’re feeling timid!) Blue cheeses and chocolate also go together really well--a great balance of salty and sweet.

Pair cheeses with: Dried cherries, walnuts, marcona almonds (I love these!), fresh grapes, crackers and French bread.


Yummy! Thank you so much, Sydney and Murray's! Have you tried any of these cheeses before? Do you have a different favorite cheese that you'd recommend? I'd love to hear...

Dinner etiquette


I've always been fascinated by etiquette, including which fork to use and where to put your napkin when you leave the table. It's like a little game, and it can make you feel more confident and empowered. So, here's a handy guide to eating dinner, illustrated by the fantastic Gemma Correll...

If you're a guest at a dinner party (pictured above), wait to start eating until the host or hostess takes his or her first bite (unless they absolutely insist that you start).


A funny tip that my grandparents used to tell us: The way to sit in your chair is to pretend a cat is in front of you, a mouse is behind.


Your wine and water glasses are to the RIGHT of your plate. Your bread plate is to the LEFT of your plate. If you remember that, you'll never drink someone's water or eat their bread again! (A genius tip from readers: To remember the order of the placesetting, think "BMW" -- for bread, then meal, then water.)


Surprisingly, salt and pepper should be passed together, even if someone asks only for one. They're considered "married!"


Never intercept a pass. For example, don't snag a roll out of the bread basket when it's on the way to someone else. (You'll just have to ask them to pass the basket right back!)


Scoop your soup with your spoon tilted *away* from you. And surprise! It’s fine to tilt the bowl slightly away from you to get the last drop of soup. But never blow on your soup or food. Even if it’s piping hot!


Always taste your food before putting on salt and pepper. It's considered rude to assume the food is under-seasoned before tasting it.


Once you've picked up a utensil, it should never touch the table again. You want your utensils to rest fully on the edge of your plate. ("No oars!" gasp the experts.)


When you are finished with your meal, your knife and fork should be placed on your plate diagonally from upper left to lower right (11 to 5 if you imagine your plate as a clock face). This is a secret code to the waiter (or host) that you’re finished.


If you have to go to the bathroom—or if you’re getting up at the end of the meal—just put your napkin to the left of your plate, loosely folded.

Chocolate-Dipped Peanut Butter Cookies (with Pretzels!)


Are you making holiday cookies this year? (It's Toby's favorite thing to do.) Today, Monique from Ambitious Kitchen shares her killer recipe for chocolate-dipped peanut butter cookies with salty pretzel and crunchy toffee. Here it is...


Chocolate-Dipped Peanut Butter Cookies with Toffee & Crushed Pretzels
by Monique Volz of Ambitious Kitchen


Peanut butter cookies are underrated. I’m not sure if it’s because everyone grew up eating the super crispy ones and found them boring, or if it’s because chocolate chip always reins king in the cookie world. Either way, I’m eager to share a new twist on peanut butter cookies. I’m quite certain you might just fall in love...

First I need to be honest: These cookies are downright addictive. In fact, they’re unlike any other peanut butter cookie you’ve ever tasted. If the instructions are followed correctly, you’ll end up with soft and chewy peanut butter cookies. And they’ll continue to stay soft for days (like they’ll last that long)!

A few secret ingredients help the peanut butter cookies bake up beautifully: dark brown sugar, honey and sour cream. The dark brown sugar adds an essential chew to the cookies, the honey gives a unique flavor and helps the cookies react to the baking soda, and, lastly, the sour cream provides moisture to keep the cookies soft.

But why stop there? Dip these babies in a little melted chocolate, then adorn them with a sprinkle of salty pretzels and sweet toffee. Yes, this cookie is sure to win you a few prizes at work. Or at least the best spouse/parent/friend award.

Recipe: Chocolate-Dipped Peanut Butter Cookies

What you'll need:

1 1/4 cups all-purpose flour
1 teaspoon baking soda
1/4 teaspoon salt
1/2 cup unsalted butter, softened
1/2 cup all natural creamy peanut butter
1 cup packed dark brown sugar (light will also work just fine)
1 egg
1 teaspoon vanilla extract
1/2 tablespoon honey
1/2 tablespoon sour cream or plain greek yogurt
1 cup chocolate chips
1 teaspoon coconut oil
1/2 cup crushed pretzel
1/2 cup toffee pieces

Preheat oven to 350F. In a medium bowl, whisk together flour, baking soda and salt. In the bowl of an electric mixer, add in peanut butter, softened butter and brown sugar; mix on medium low until well combined. Switch mixer to low speed; add in egg, vanilla extract, honey and sour cream and beat one minute or until well combined, smooth and creamy. Slowly add in dry ingredients, increasing speed to medium low; mix until just combined.

Grab a tablespoonful of dough and roll into a ball with your hands. You can also use a small cookie scoop if you have this available. Place dough on cookie sheet lined with parchment paper, leaving 2 inches apart between each dough ball. Bake for 10-12 minutes or until edges are golden brown. Allow cookies to cool on cookie sheet for 5-10 minutes before removing and transferring to a wire rack. This allows them to set and harden slightly around the edges. Repeat with remaining dough.

In a small bowl, mix crushed pretzels and toffee pieces.

Once cookies are completely cooled, you can prepare the chocolate. First, line two baking sheets with wax paper. Next, add chocolate chips and coconut oil to small pot and place over low heat. Watch carefully and stir often until chocolate is completely melted. Dip each peanut butter cookie in chocolate then sprinkle with toffee-preztel mixture. Place on wax paper and repeat with remaining cookies. The chocolate should set up within 30 minutes, but if you want to speed up the process, just place the baking sheet in the fridge for about 5 minutes.

Cookies will keep for 3-5 days if stored in an airtight container.

 
Thank you so much, Everybody!

How to pack without wrinkles


Are you traveling for the holidays? (We're going to California to visit Alex's family, and I'm excited to escape this insanely cold weather.) Well, if you're packing bags, we just discovered a cool way to pack clothes without wrinkles. Here's how...


Here are the easy steps:

1. Lay pants flat in the suitcase, so the waistbands line up with the edge and the legs hang out.
2. Lay the things that are most likely to wrinkle—like blouses and shirts—on top, so the collars line up with the edge of the suitcase and the sleeves hang out.
3. Place heavier sweaters and dresses on top.
4. Put your socks and underwear into a small bag. Place the bag in the center of the suitcase. This little "pillow" will keep your clothes from wrinkling.
5-7. Gently fold the ends of your clothing around the tote bag.
8. Tuck your shoes, belts and toiletries bag around the clothes.


Voila! A perfectly-packed suitcase. And when you arrive, your clothes will be wrinkle-free.

TOP 10 WAYS TO ELIMINATE CHEST WRINKLES

                                                             (photo courtesy Chestwrinkles.net)

The other day I had a customer in her late 30's/ early 40's ask me about how to eliminate chest wrinkles. I've had them myself since I began to sleep on my side after a car accident over a decade ago and they don't tend to bother me because my skin is so fair. It's not something I or others tend to notice. In her case she is tan and wrinkles can be more pronounced on tan skin as the wrinkles have grooves that get less exposure than the layers that are exposed to the sun. 

Most of us neglect to take care of our poor necks and décolletés, not to mention hands. I have compiled a list of my top ten ways to either repair or prevent chest wrinkles since Photoshopping ourselves in real life is still not yet an option.

 A FEW WAYS TO GET RID OF CHEST WRINKLES

1. Sleep on your back- Simply put if you sleep on your back the skin does not fold over causing the grooves. I say that it is better to get quality sleep than worry about sleeping on my side.
2. Laser- Laser, especially Fraxel® can temporarily restore the collagen and make the grooves less apparent, but over time this can thin the skin and cause sun-sensitivity. If you sleep on your side you'll still eventually have the same issues.
3. Silcone Pad- A silicone pad is my favorite. You can slap on some cream, slap on the pad and give yourself an overnight anti-aging treatment. I find this to be one of the more effective ways to not only repair, but prevent the wretched train tracks.


4. Breast Pillow- The breast pillow has become popular from television reports, but I find strapping them on appears to be tedious. At bed time I just want to finish my beauty routine and drop into bed. Some of the reviewers of these products suggest sticking a towel or another object between the breasts to keep them from folding over instead of forking over the cash for the pillow.
5. Fillers- Filling the skin is another way to effectively help reduce the grooves. Juvederm tends to be the filler of choice, but Restylane® is also an option.
6. Dermarolling- This is another favorite of mine. I like to perform dermarolling for my customers to help strengthen the collagen and imbed vital nutrients like vitamin c, e. Please don't do this at home.
7. Sunblock- (not sunscreen) Self explanatory. Sunscreen helps to keep cell damage minimal and keep skin elastic.
8. Antioxidants, Vitamins and Peptides- Eating foods rich in antioxidants and vitamins (vitamin c helps to build collagen) is very important in keeping skin elastic. If you feed your body, your cells and thus your skin will greatly benefit. Topically applying vitamins can also be beneficial. Vitamin C at 15 or 20% is great at building collagen. I also just discovered a line called Bionova that builds the skin through vitamins.
9. Exfoliate- Exfoliation (SUPER fine grain) helps to improve circulation and keep skin more elastic causing the wrinkles to minimize. Physical exfoliation is great for skin tone. Chemical exfoliation is for age spots and other discoloration, but you must be careful in the sun.
10. Moisture- This one is also self-explanatory. The more hydrated the skin, the less lines appear and more elastic the skin. Moisturized skin also helps to fight harmful UV damage. I prefer raw coconut oil or whipped shea butter.


Please note I did not add items like the Dermawand or LightStim as other options. I find that most people are not diligent enough to do these things, which is why they did not end up in my top ten list.

DIY DRY SHAMPOO FOR DARK AND LIGHT HAIR

Recently International artist Mercedes Parilli of the George Salon in Chicago caught my attention when I saw her yummy recipes for dry shampoo! I love a good dry shampoo especially because I have such fine, heavy hair. I grew up with my mother using Clairol's Psssst when I was a kid and saw how much time it saved me as a teen especially during the Rave and Aquanet days!

According to hairstylist icon Orlando Pita (whose client roster includes Madonna and Gweneth Paltrow among dozens of others) there is such a thing as washing your hair too much.  He always used to remind me that we really should only be washing our hair once or twice a week otherwise we could be stripping the essential oils from our hair. In fact, washing your hair too often can make your hair even oilier. Teen Vogue has a nice article about that.

Mercedes Parilli informs us that "our cupboards hold everything you need to make your own dry shampoo! Just grab corn starch (which is more natural compared to baby powder and baking soda). Corn starch is also very oil-absorbing!"

 Brunette Formula = Mix Corn starch + Cocoa Powder
If you have darker hair, mix unsweetened cocoa powder with cornstarch.


Redhead Formula = Mix Corn starch + Cinnamon
If you're a redhead, use cinnamon with cornstarch equal parts.


Blonde Formula = Mix Corn starch + Essential Oil

If you have light colored hair, mix cornstarch with an essential oil of your choice for fragrance.


DIRECTIONS: 


Once mixed, apply with a large cosmetic brush or put into a salt shaker and apply to roots. After application, rub in really well to absorb oil and style accordingly.


Parilli says making your own natural dry shampoo is inexpensive and helps you avoid hazardous chemicals. Dry shampoo made at home is fast-acting and your hair will feel, look and smell amazing. Using dry shampoo the second or third day of not washing your hair saves time while keeping your hair looking great. But, it is also important to cleanse your scalp regularly. Cleansing the scalp keeps hair follicles stimulated for healthy hair growth.

HOW TO AVOID EYE WRINKLES


For many years now I have been doing skin evaluations thanks to the Beau Visage (3mm below the skin). The photo on the right shows blood flow with sun damage on this customer's skin. The photo on the left is just sun damage that is coming to the surface. What's cool about these images is that it shows the customer has been super diligent wearing her sunglasses- so much so that hardly any sun ever reached her eye area. She hardly has any wrinkles or pigmentation around her eyes (even if you can tell in the blood photo she has had lid surgery).

The other cool thing about this photo is that if you look VERY closely you can see a big white patch right in the middle of her forehead. This is where she has had botox injections. Botox stops blood flow from going to the muscle so that the muscles don't contract. Unfortunately it also stops the nutrient supply to the cells and skin around the injection site. In person her skin is very thin and shiny in that area compared to the rest of her forehead.

Back to eyes- I can't emphasize how important it is to wear large UV 400 sunglasses if you want to reduce eye wrinkles. I have seen hundreds of photos like the one pictured above and there is no question sun damage correlates with eye wrinkles. There are two reasons why: one cellular/dna damage that breaks down the cell and the collagen and the other is the actual act of squinting deepening the lines by separating the collagen deep below the skin.

Dr. Mercola is not a fan of wearing sunglasses for many reasons, but if you follow this link it goes into why. He has some great tips as to choosing the correct sunglasses (not sun wear that might hurt your vision). While I may not entirely agree with everything he says here there is a lot of great information at that link.

Also, beware of eye cream. Most eye creams out there are irritating because they are meant to bring extra blood flow to the delicate tissues around the eyes. This helps to temporarily puff out the wrinkles. This method is counterproductive in regards to anti-aging. The puffing stretches out the skin and causes loss of elasticity. It also does a lot of other things, but for now just know if it irritates you then stop using the eye serum. Go for a coconut oil or shea butter instead to help hydrate the delicate tissue around the eyes. Many fine lines around the eyes can be prevented with just a little moisture (applied with your ring finger with movements towards the nose)!

Thursday, December 4, 2014

Shine Beauty Beacon: 2014 Howl-o-Scream Polish Giveaway: Bewitching Nai...

Shine Beauty Beacon: 2014 Howl-o-Scream Polish Giveaway: Bewitching Nai...: Muahaha... We've conjured up a scary good way to enjoy spooktacular style this season.  What a scream! Our latest giveaway showc...

Fall Spa Week: Polish, Pamper & Protect Your Skin ...

Shine Beauty Beacon: Fall Spa Week: Polish, Pamper & Protect Your Skin ...: Photo courtesy Witches Falls Cottages The calm before the storm. That's what fall Spa Week feels like, as Halloween, Thanksgivin...

Fall Spa Week: Polish, Pamper & Protect Your Skin ...

Shine Beauty Beacon: Fall Spa Week: Polish, Pamper & Protect Your Skin ...: Photo courtesy Witches Falls Cottages The calm before the storm. That's what fall Spa Week feels like, as Halloween, Thanksgivin...